Amazon ElastiCache is a web service that makes it easy to set up, manage, and scale a distributed in-memory data store or cache environment in the cloud. It provides a high-performance, scalable, and cost-effective caching solution, while removing the complexity associated with deploying and managing a distributed cache environment.
Note: Your Amazon ElastiCache instances can only be accessed through an Amazon EC2 instance.
Sample Introduce
Amazon ElastiCache for Redis support for partitioning your data across up to 15 shards (called node groups in the ElastiCache API and AWS CLI).
With Amazon ElastiCache for Redis, you can start small and easily scale your Redis data as your application grows - all the way up to a cluster with 6.1 TiB of in-memory data. It supports online cluster resizing to scale-out and scale-in your Redis clusters without downtime and adapts to changing demand.
How it works

Useful Case:
How to build a caching application with ElastiCache for Redis

Amazon ElastiCache for Redis offers List data structure making it easy to implement a lightweight, persistent queue.

Amazon ElastiCache for Redis is highly suited as a session store to manage session information such as user authentication tokens, session state, and more. Simply use ElastiCache for Redis as a fast key-value store with appropriate TTL on session keys to manage your session information

Use Amazon ElastiCache for Redis
Determine System Requirements
Memory and Processor
The basic building block of Amazon ElastiCache is the node. Nodes are configured singularly or in groupings to form clusters. When determining the node type to use for your cluster, take the cluster’s node configuration and the amount of data you have to store into consideration.
The Redis engine is single threaded, so a node’s number of cores is irrelevant.Cluster Configurations (More details)
Amazon ElastiCache for Redis clusters provide a variety of node configurations:- Single Node
- Single Shard Multiple Nodes
A single shard configuration groups up to 6 nodes in a single cluster, a read/write Primary node and up to 5 read-only Replica nodes. - Multiple Shards Multiple Nodes
A multiple shard configuration partitions your data across up to 20 shards in the cluster. Each shard has a read/write Primary node and up to 5 read-only replica nodes.
Scaling Requirements
Redis multiple shard clusters can be scaled out or in. To scale a Redis multiple shard cluster, you add or remove shards from the cluster. If your application is connecting to the cluster’s configuration endpoint, you do not need to make any changes in your application when you add or remove shards.Failover Requirements
When Automatic Failover is enabled, if a Redis Primary node fails for any reason, one of the shard’s read-only replica nodes is promoted to Primary. If Automatic Failover is not enabled and the Primary fails, ElastiCache for Redis spins up a new node to fill the Primary role. This operation is much more time consuming than failing over to a replica node.
Automatic failover is only available on clusters running the Redis engine with multiple nodes.Access Requirements
Amazon ElastiCache are accessed from Amazon EC2 instances. Network access to an ElastiCache cluster is limited to the user account that created the cluster. Therefore, before you can access a cluster from an Amazon EC2 instance, you must authorize the Amazon EC2 instance to access the cluster. The steps to do this vary, depending upon whether you launched into EC2-VPC or EC2-Classic.Region and Availability Zone Requirements
Amazon ElastiCache supports all AWS regions. By locating your ElastiCache clusters in a region close to your application you can reduce latency. If your cluster has multiple nodes, locating your nodes in different Availability Zones can reduce the impact of failures on your cluster.
Setup A Cluster
Create User
Login AWS IMA, and create a user with AmazonElastiCacheFullAccess policy, which comes pre-provisioned with permission that the service requires to create a Service Linked Role on your behalf.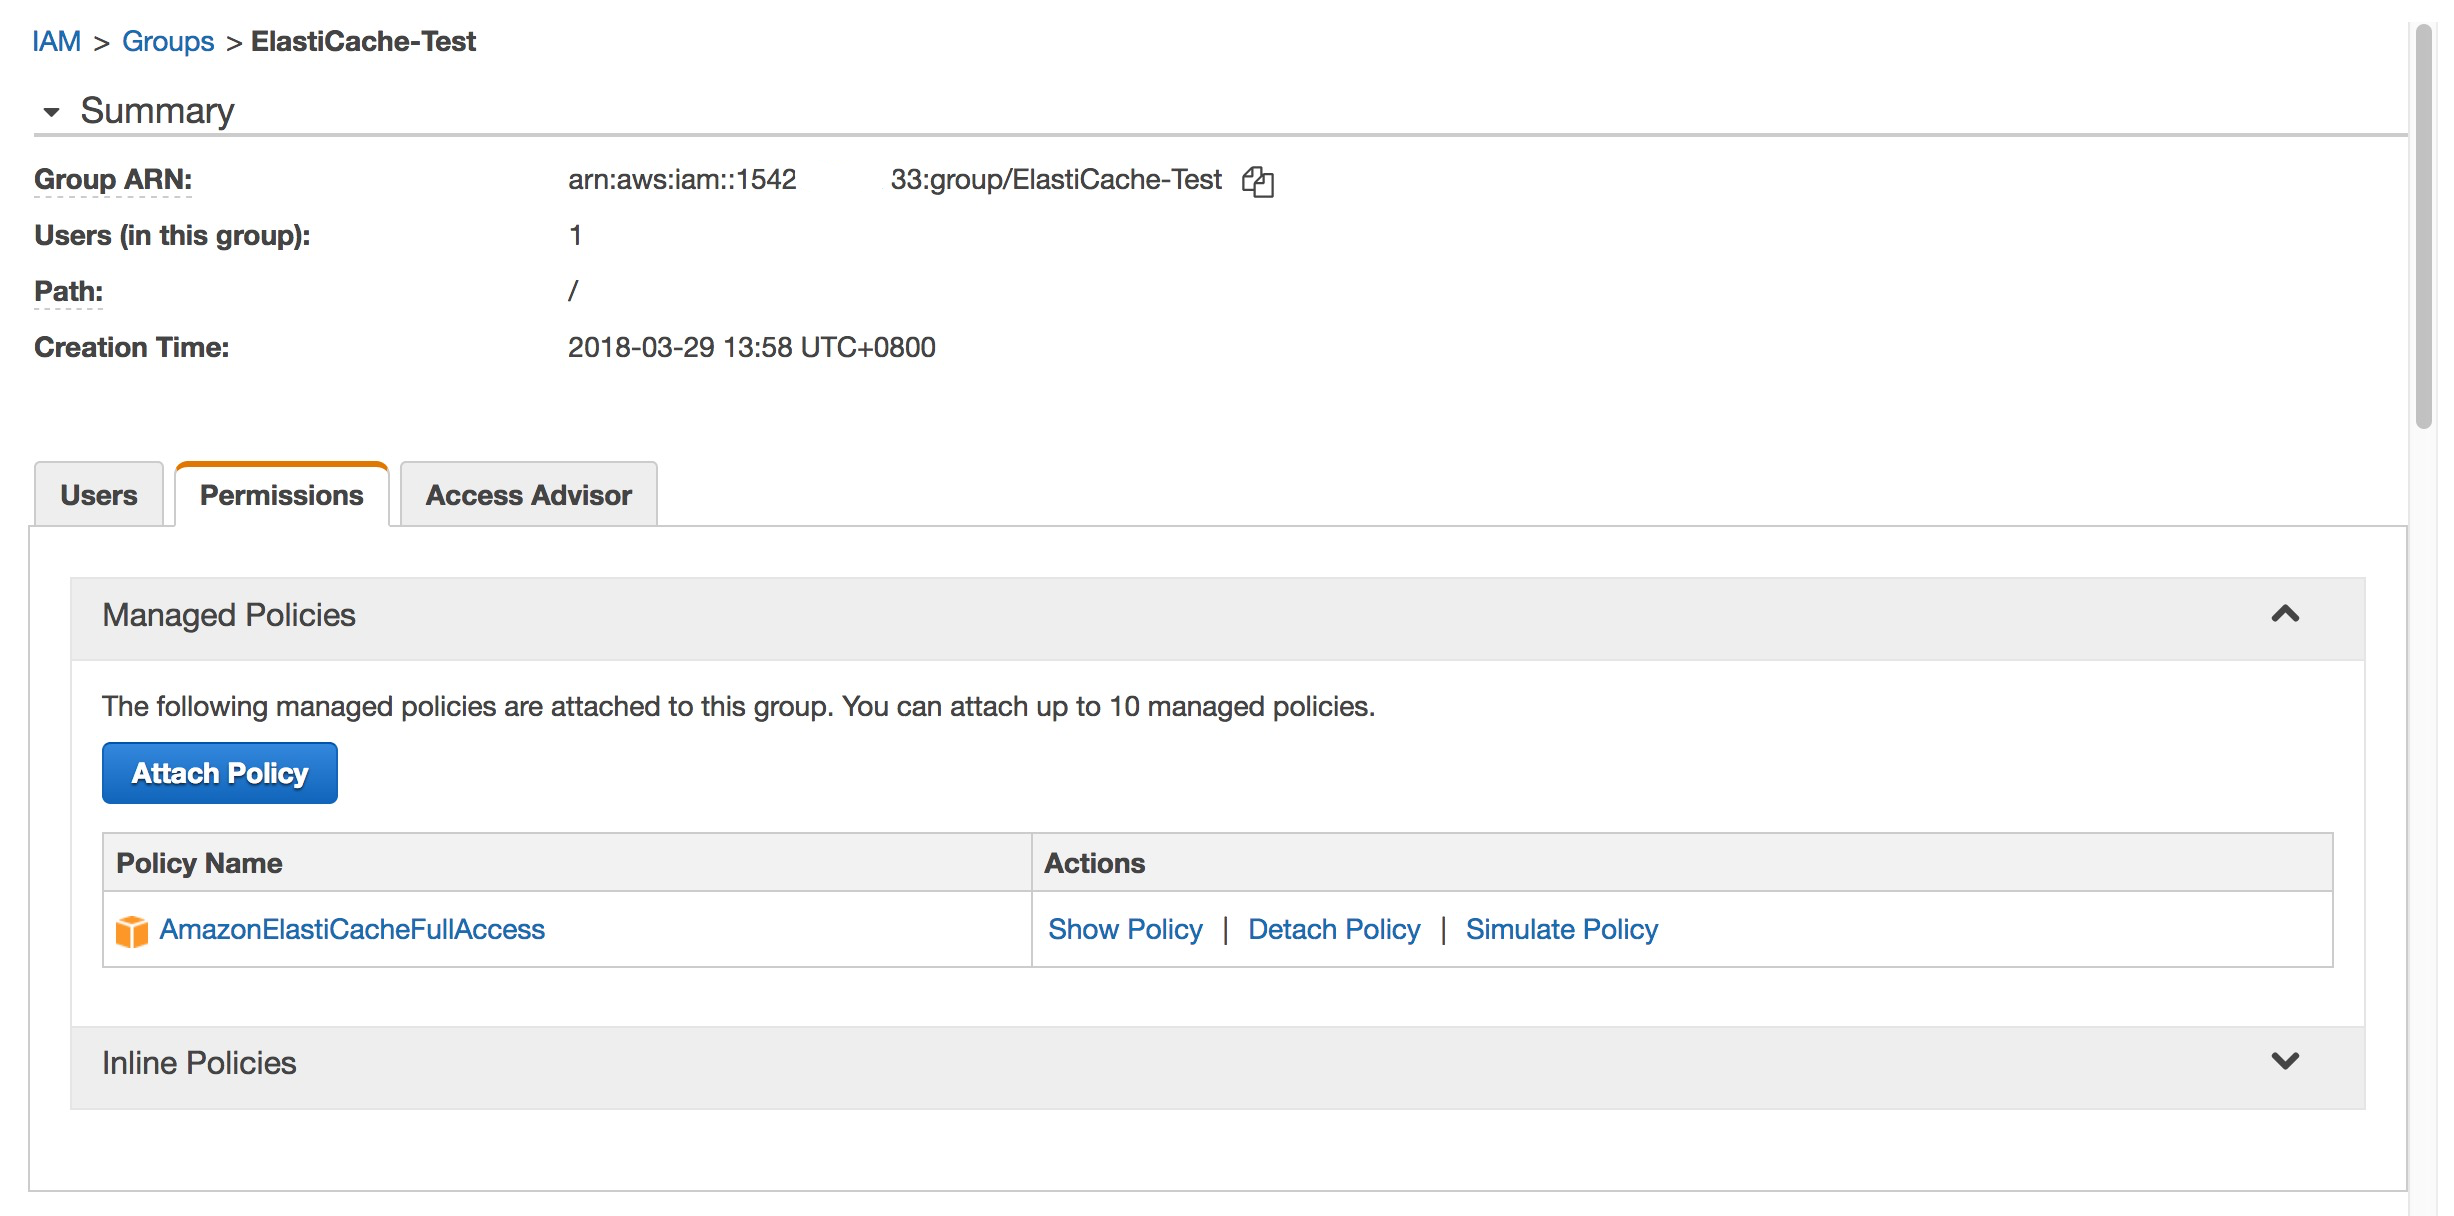
If you are not using the default policy and choose to use a custom managed policy, ensure you have either permissions to call iam:createServiceLinkedRole or you have created the ElastiCache Service Linked Role.
Launch a Cluster
To create a standalone Redis (cluster mode disabled) cluster:
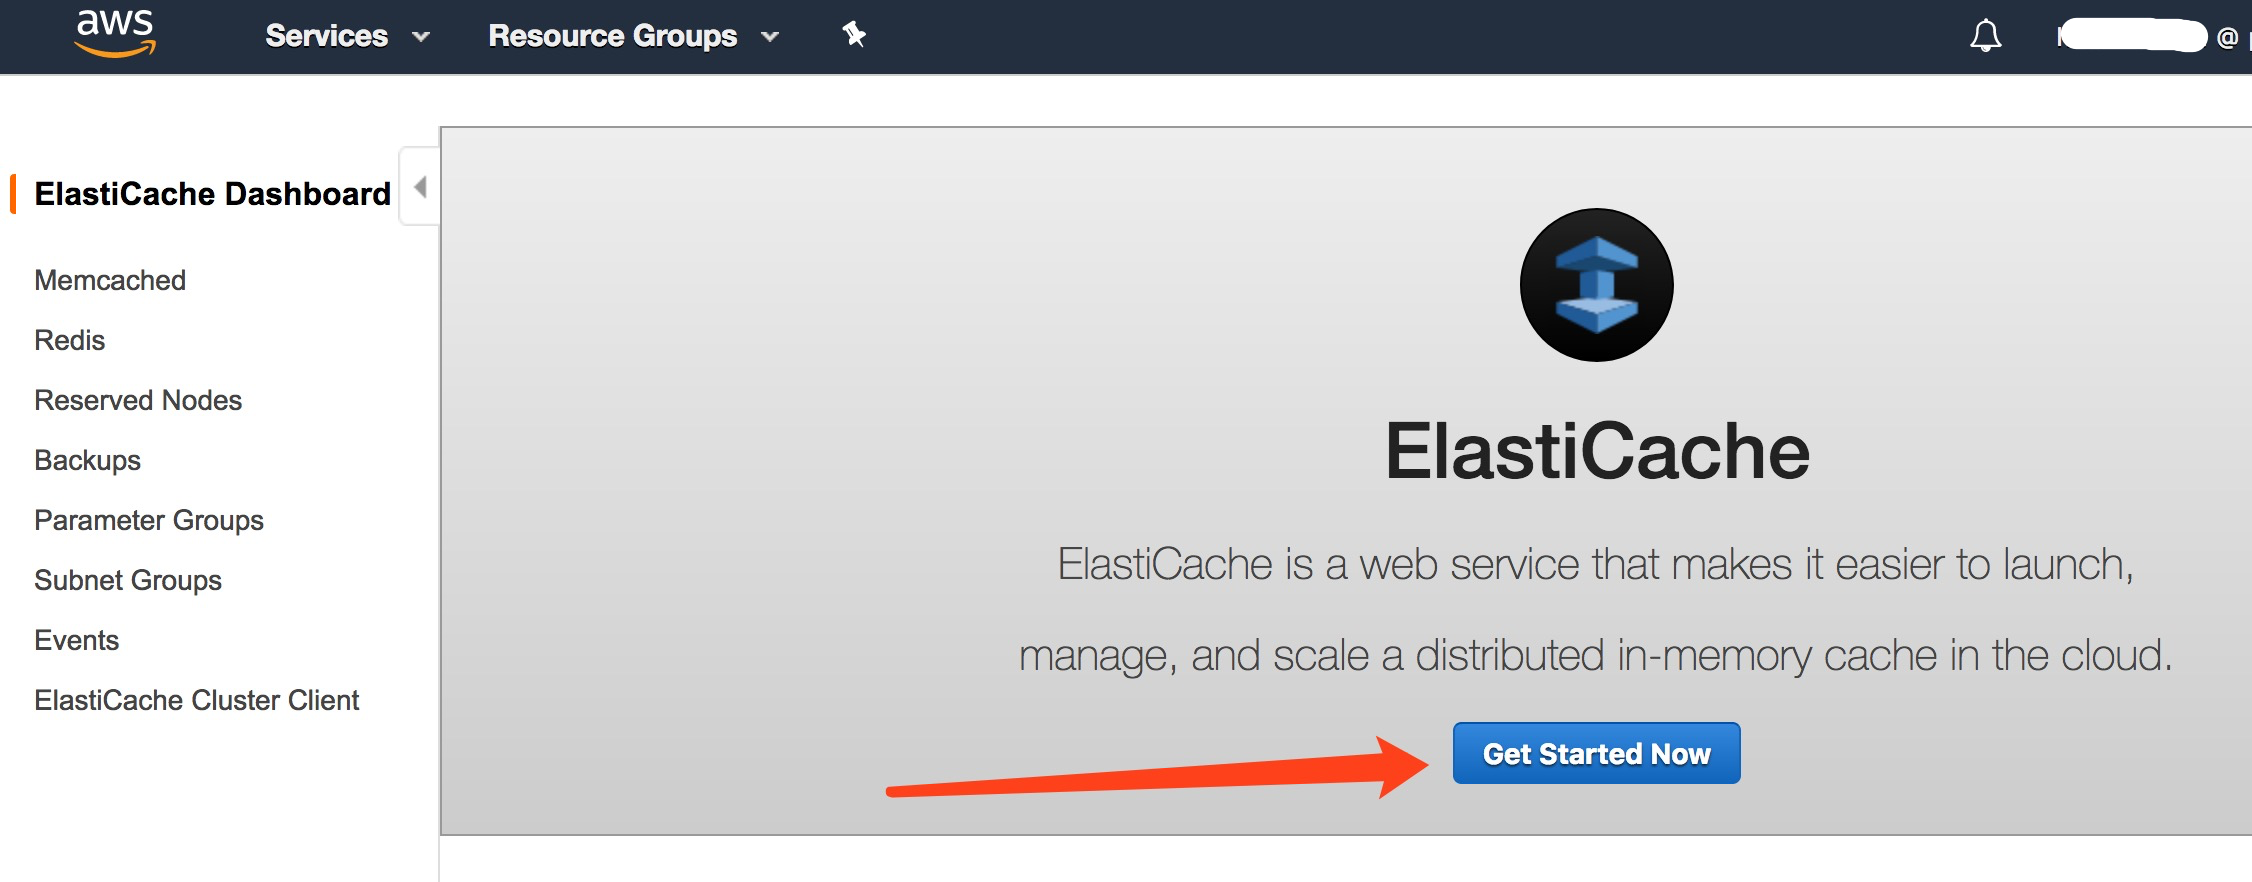
- Sign in to the AWS Management Console
- Choose Get Started Now.
- Choose the region

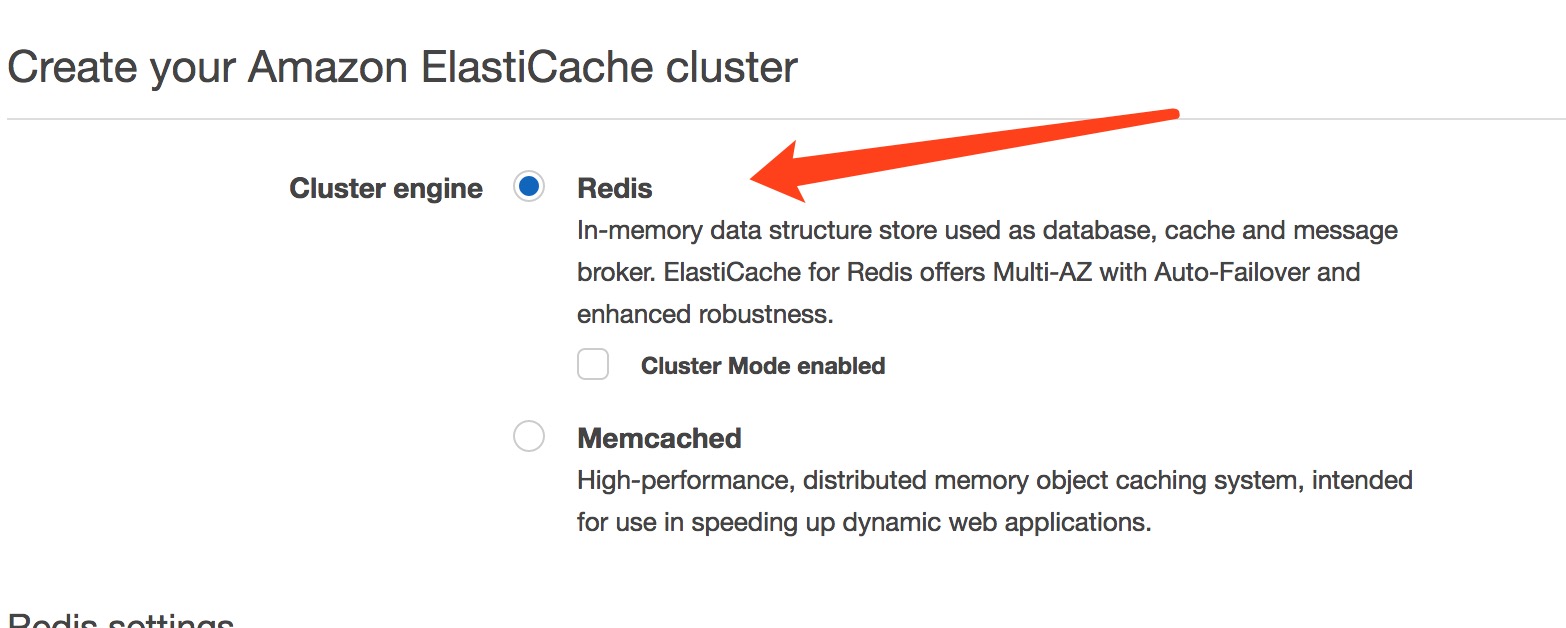
- Choose Redis as cluster engine
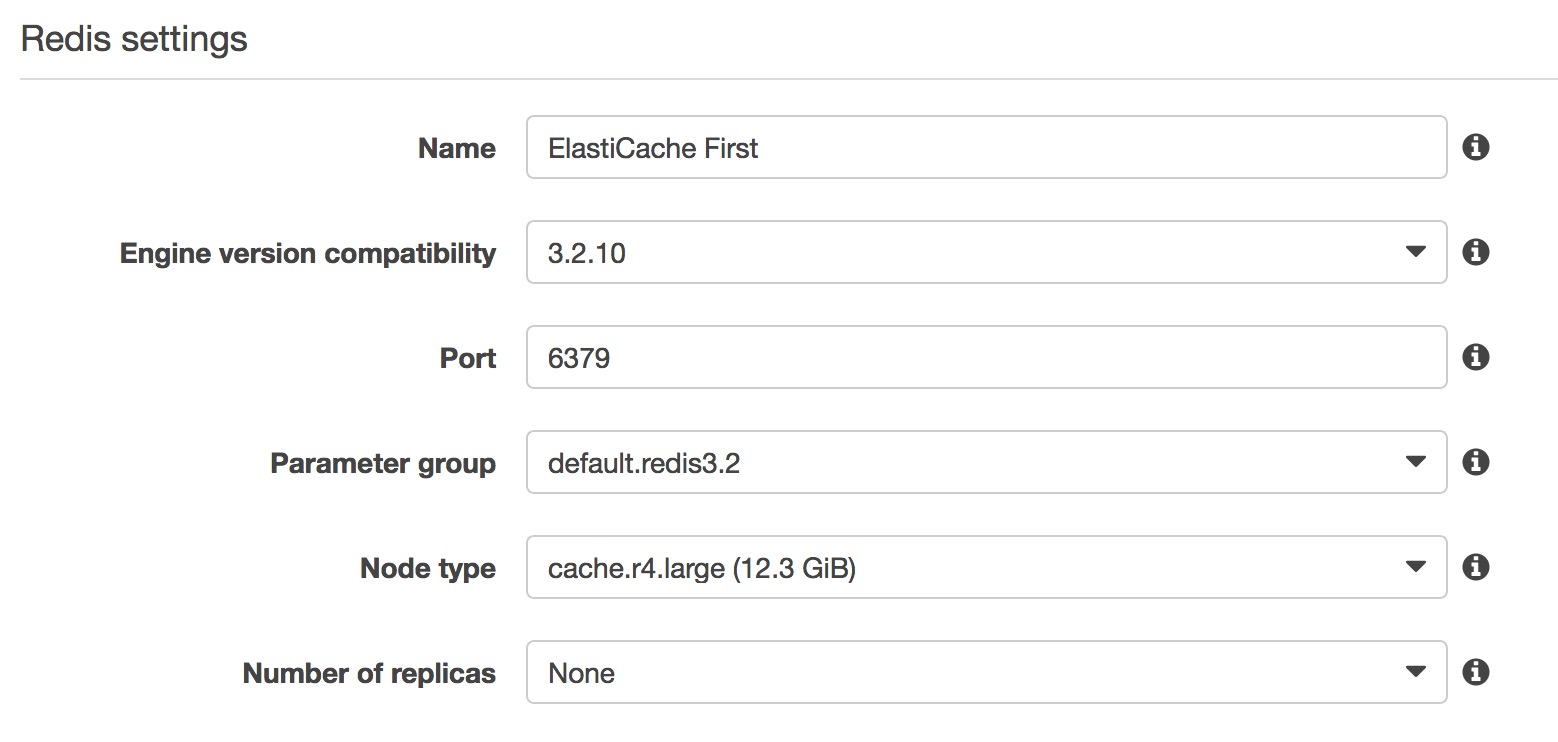
- Complete ‘Redis settings’
- Complete ‘Advanced Redis settings’
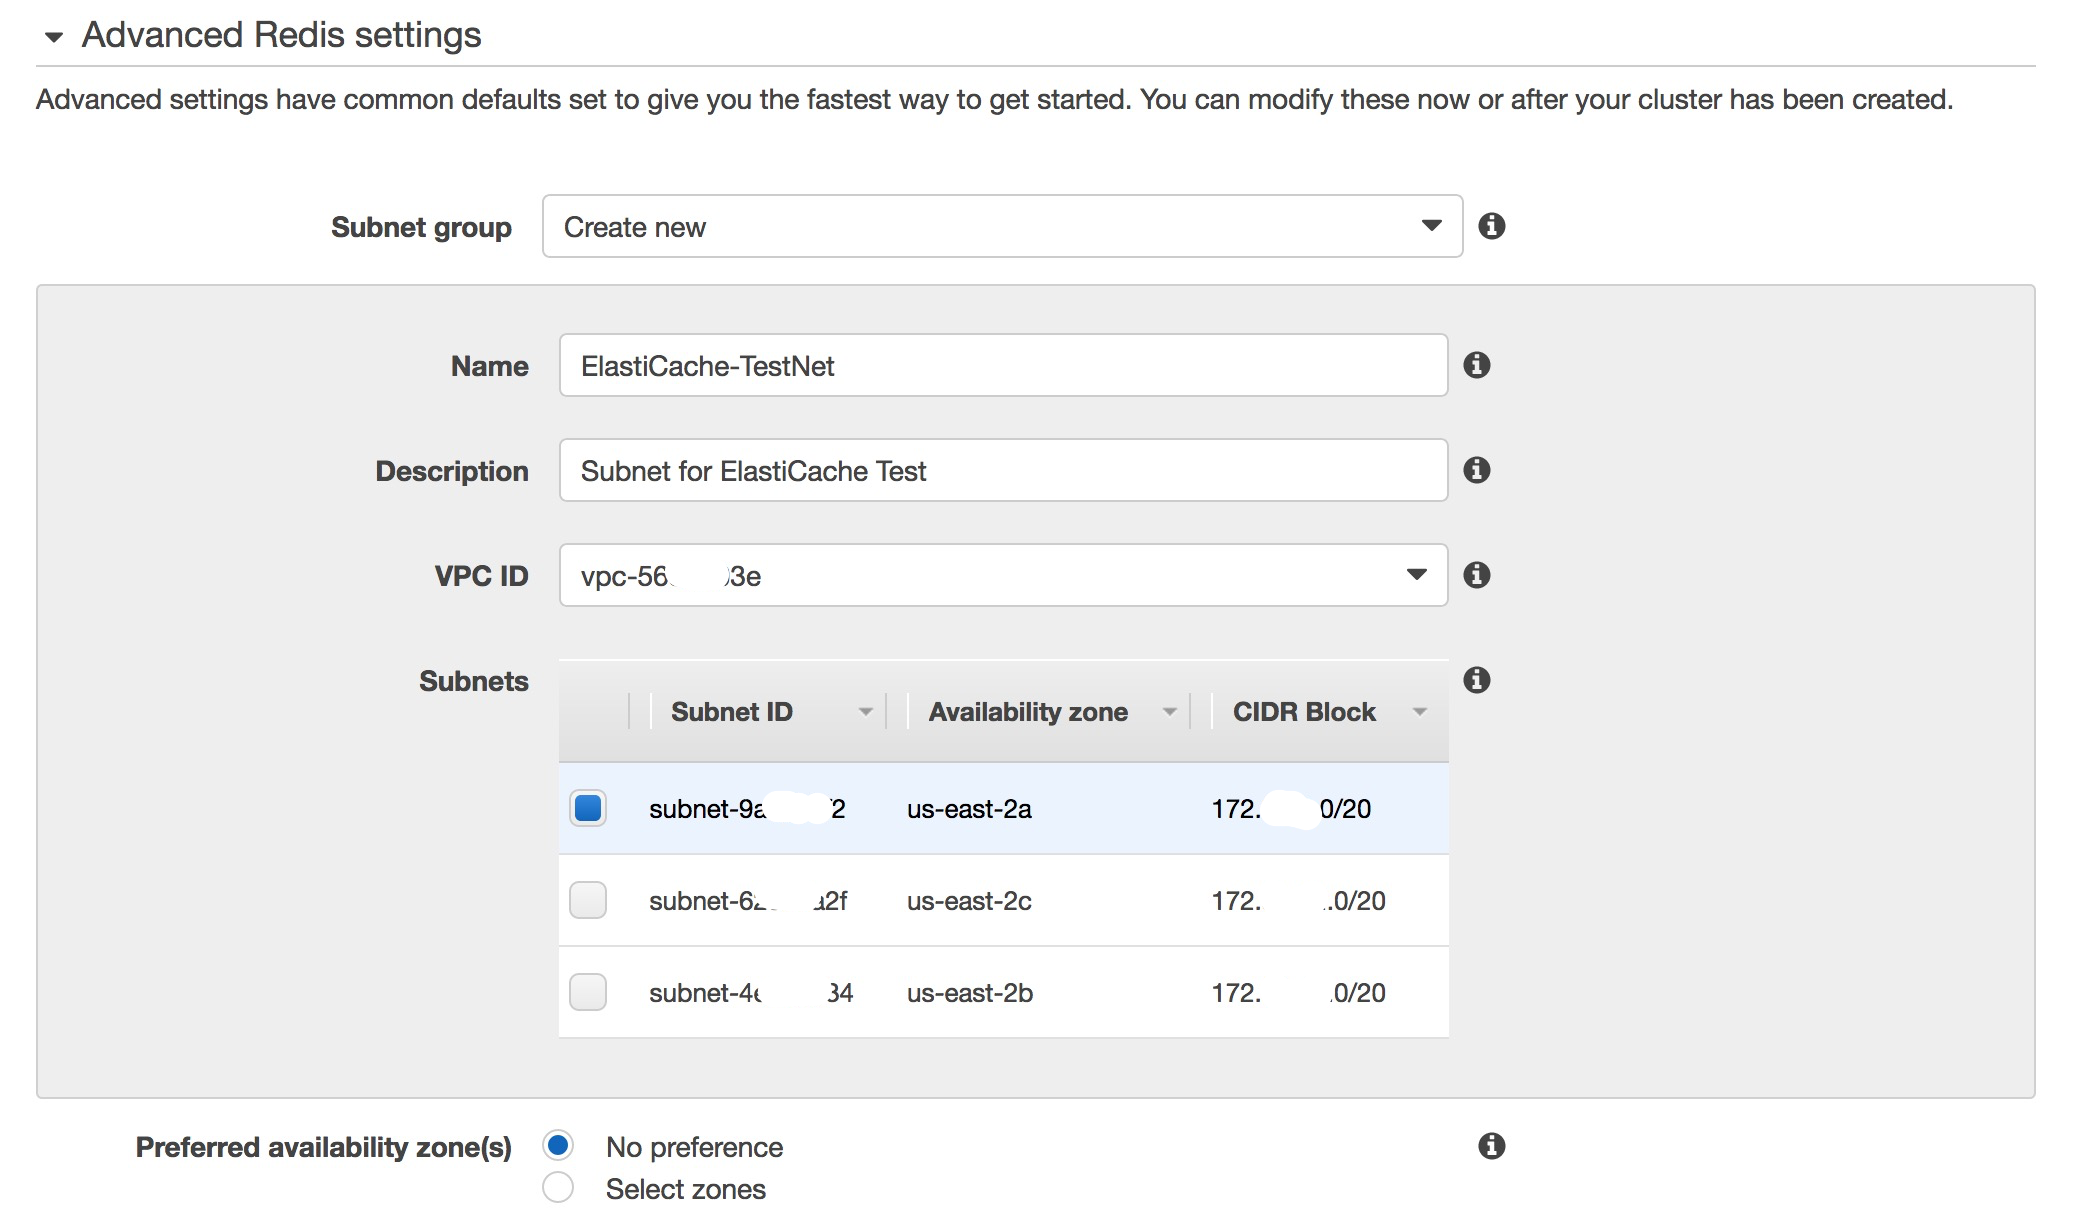
- The other items are kept as default
- Choose Create cluster to launch your cluster
Note: These configurations are used for test, there will be a couple of difference for Prod.
Refer:
https://docs.aws.amazon.com/zh_cn/AmazonElastiCache/latest/UserGuide/GettingStarted.CreateCluster.html
https://docs.aws.amazon.com/AmazonElastiCache/latest/UserGuide/Replication.CreatingReplGroup.NoExistingCluster.Cluster.html
View Cluster Details
The ‘create’ action will take a while. To view a Redis (cluster mode disabled) cluster’s details
- Login to Amazon ElastiCache console
- View the details of cluster cluster we created
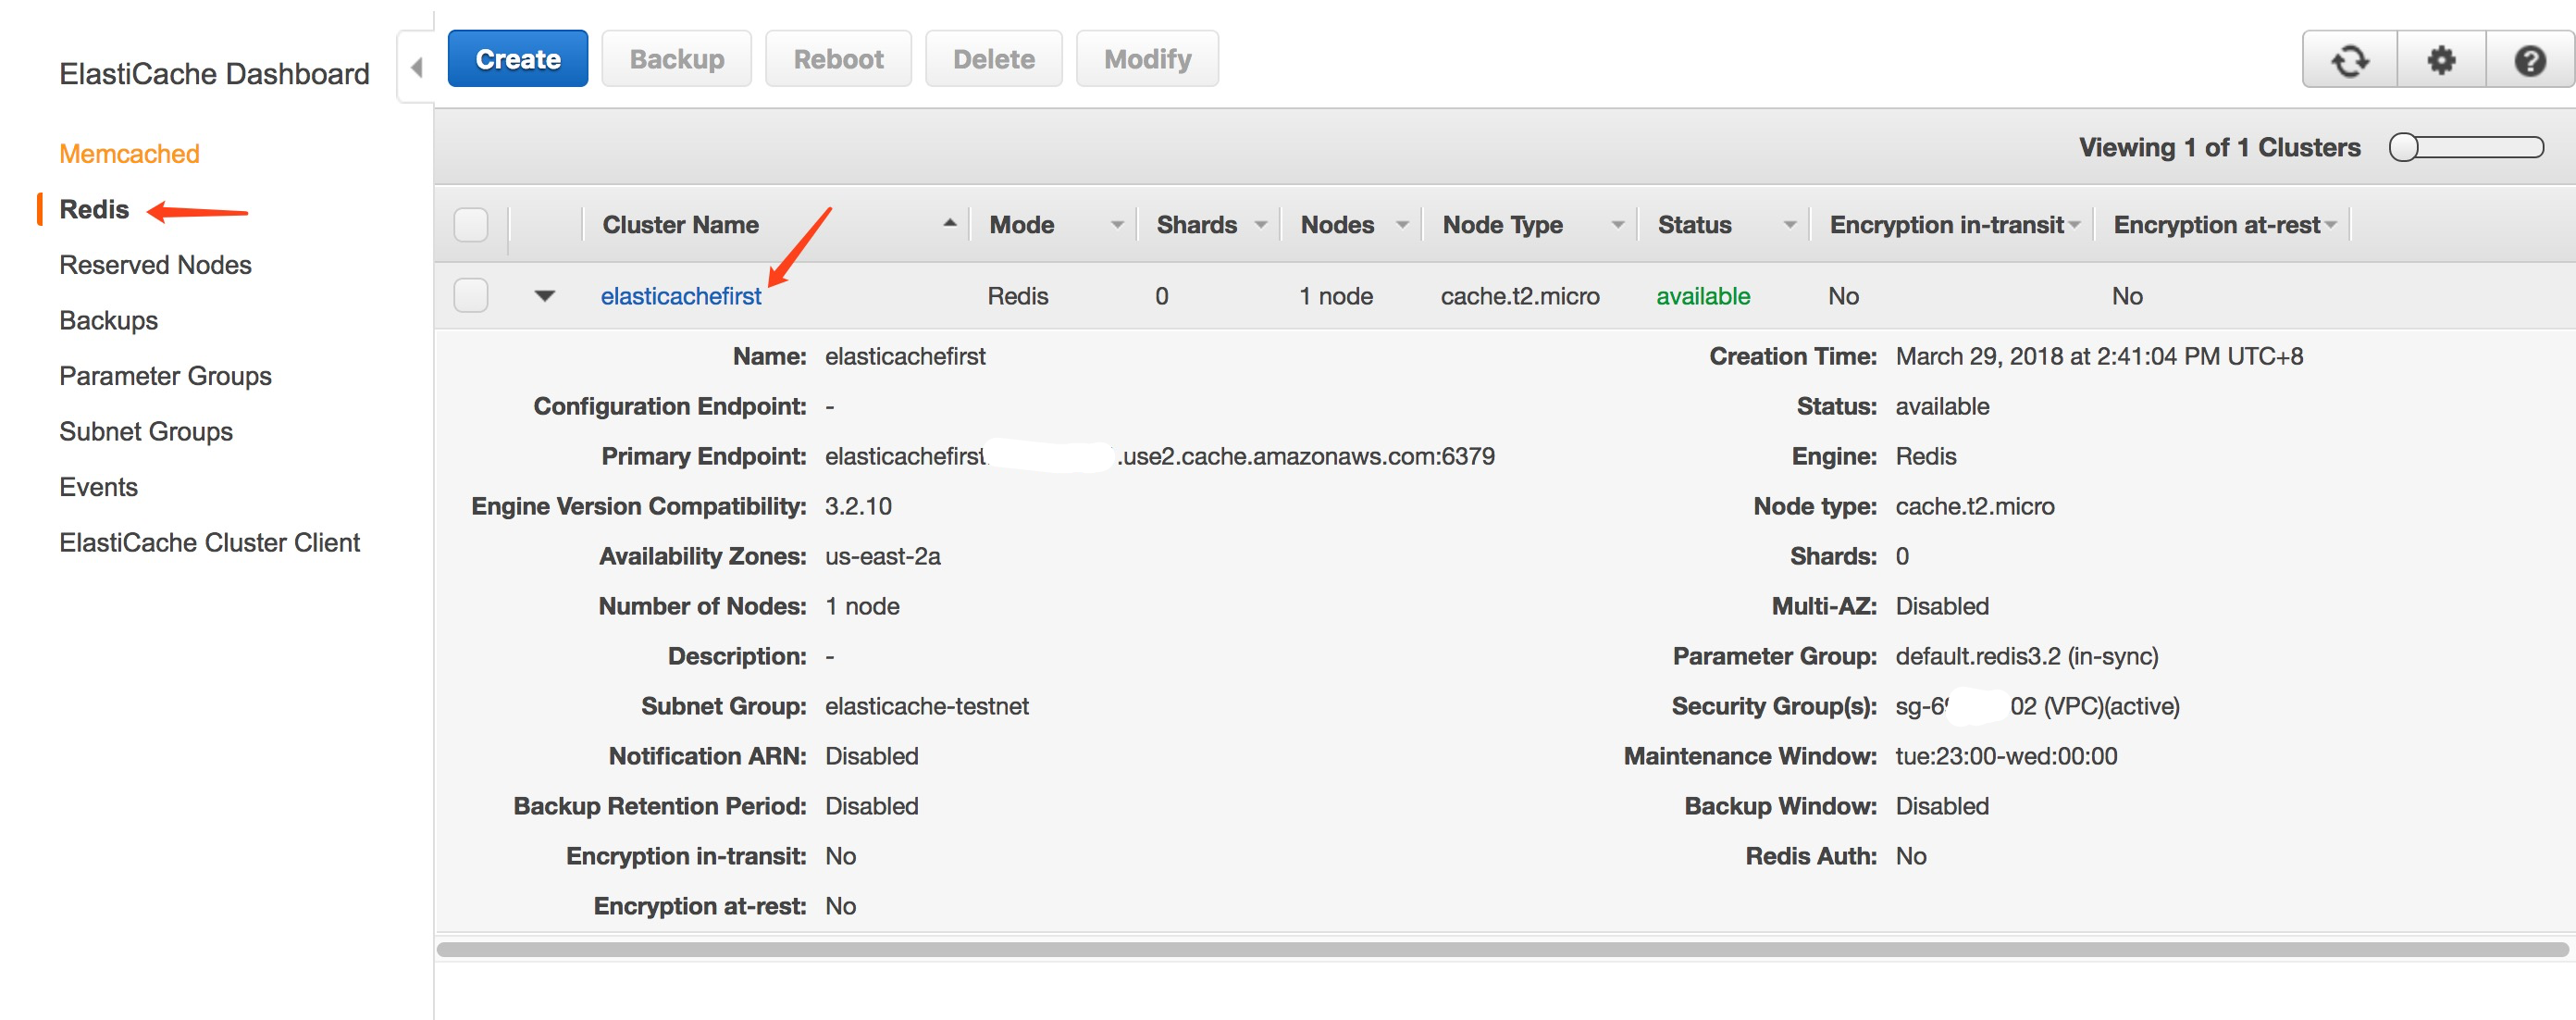
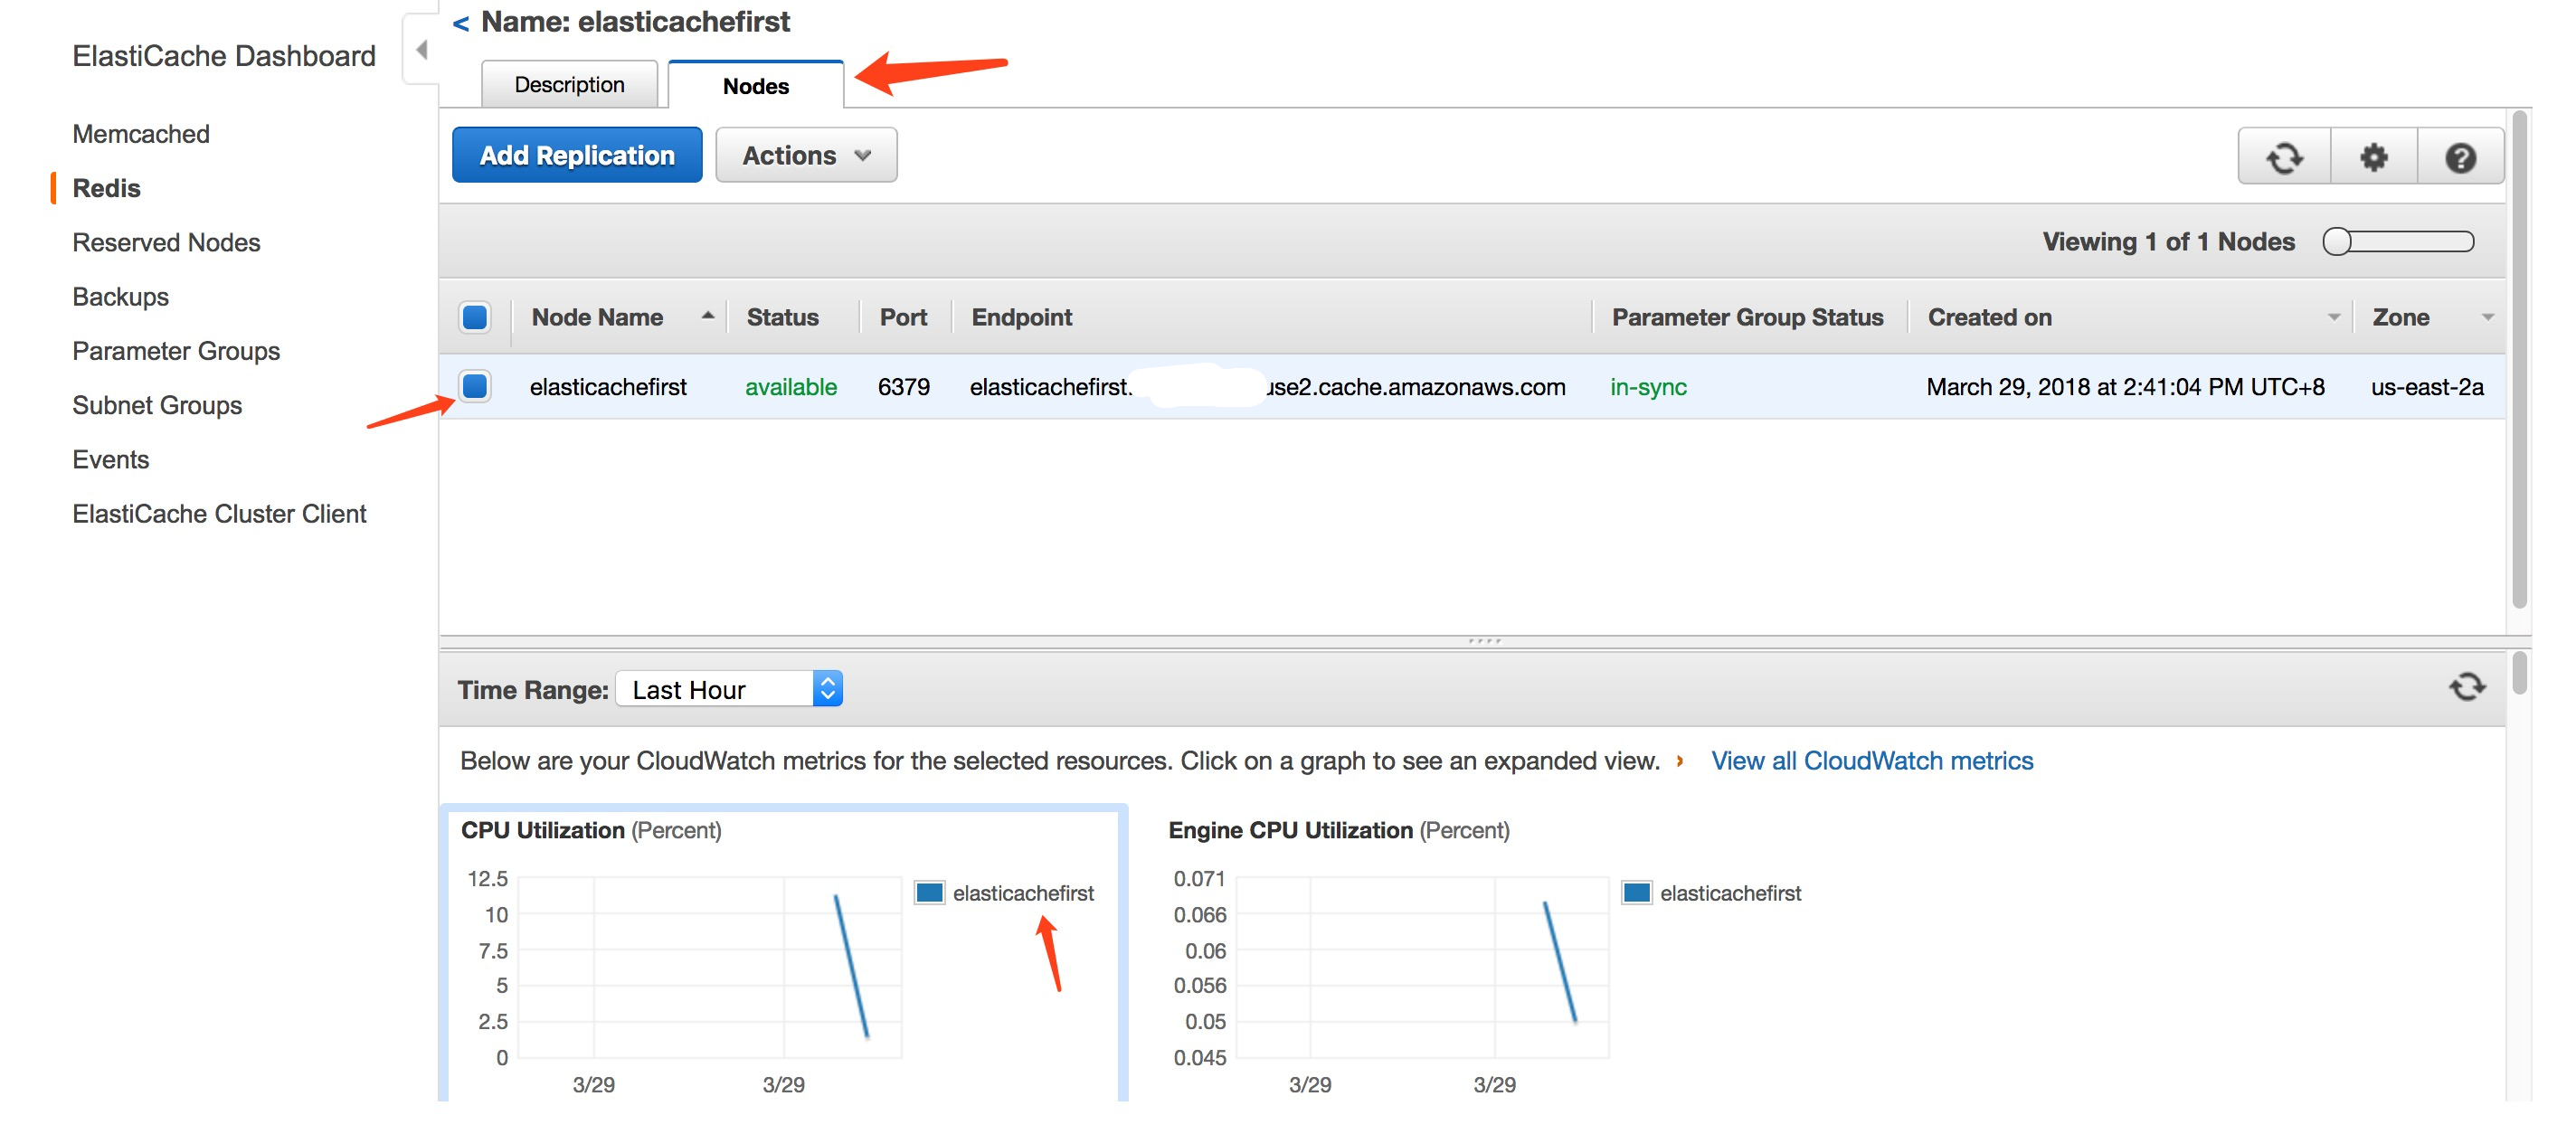
- Click on the cluster’s name, the node(s) in the cluster will be listed, and you can see the metrics of each node
Authorize Access
AS Amazon ElastiCache instance can only be accessed through an Amazon EC2 instance, all ElastiCache clusters are designed to be accessed from an Amazon EC2 instance. The most common scenario is to access an ElastiCache cluster from an Amazon EC2 instance in the same Amazon Virtual Private Cloud (Amazon VPC).
Now the ElastiCache instance should be launched into EC2-VPC. You can connect to your ElastiCache cluster only from an Amazon EC2 instance that is running in the same Amazon VPC. In this case, you will need to grant network ingress to the cluster.
To grant network ingress from an Amazon VPC security group to a cluster:
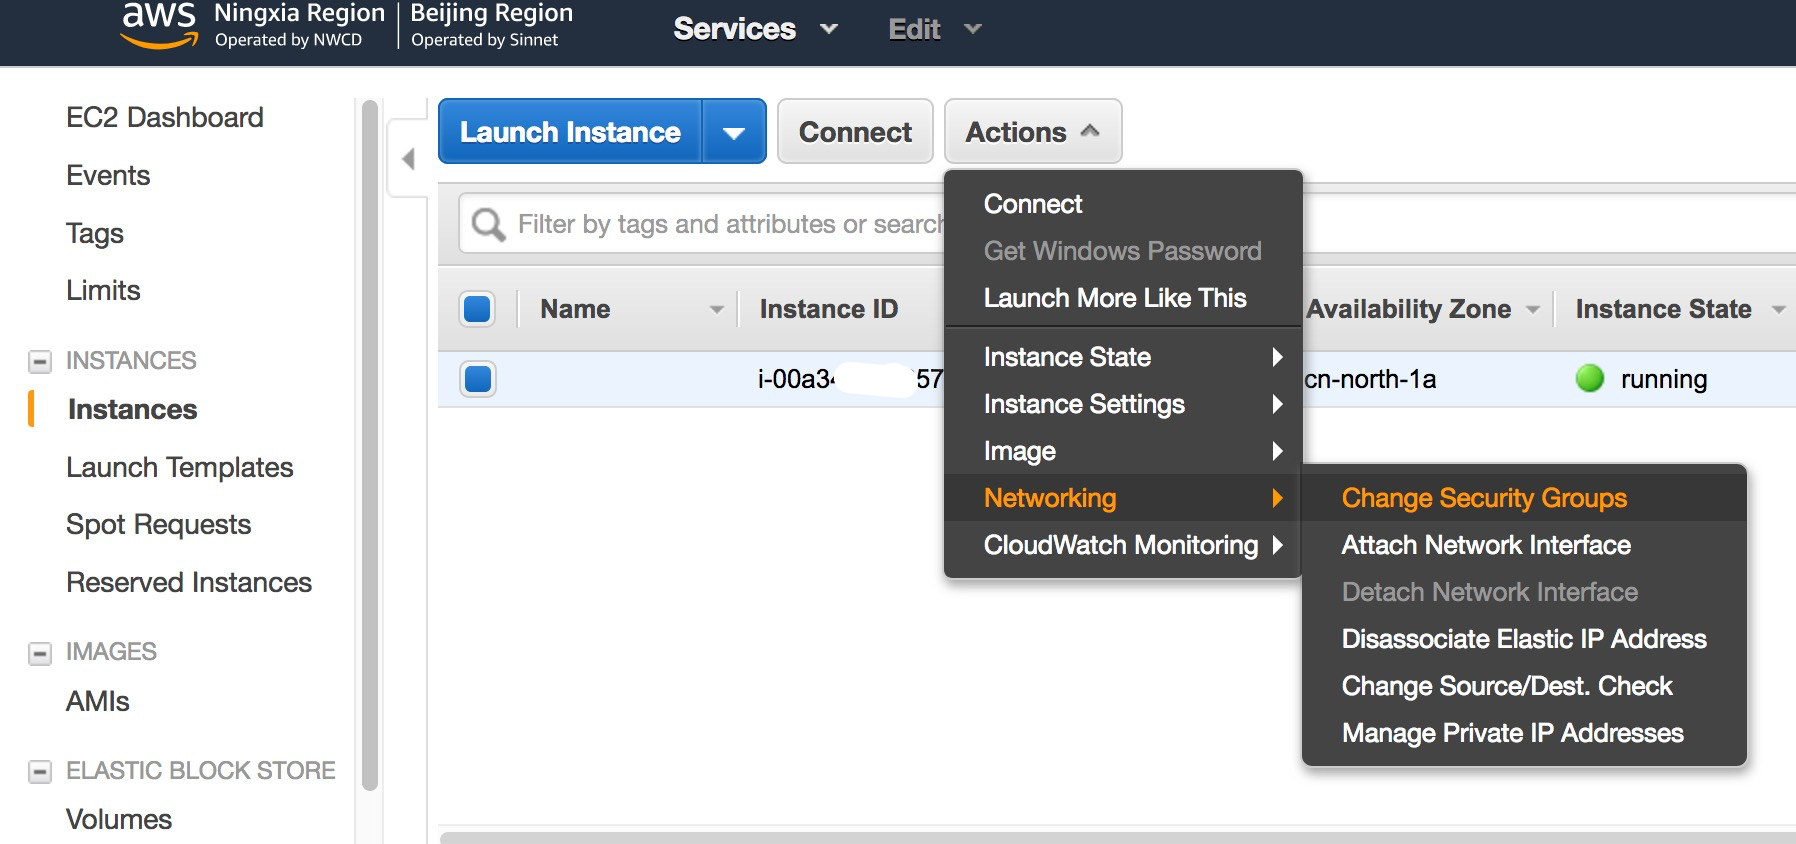
- Login Amazon EC2 console
- Configure Security Groups
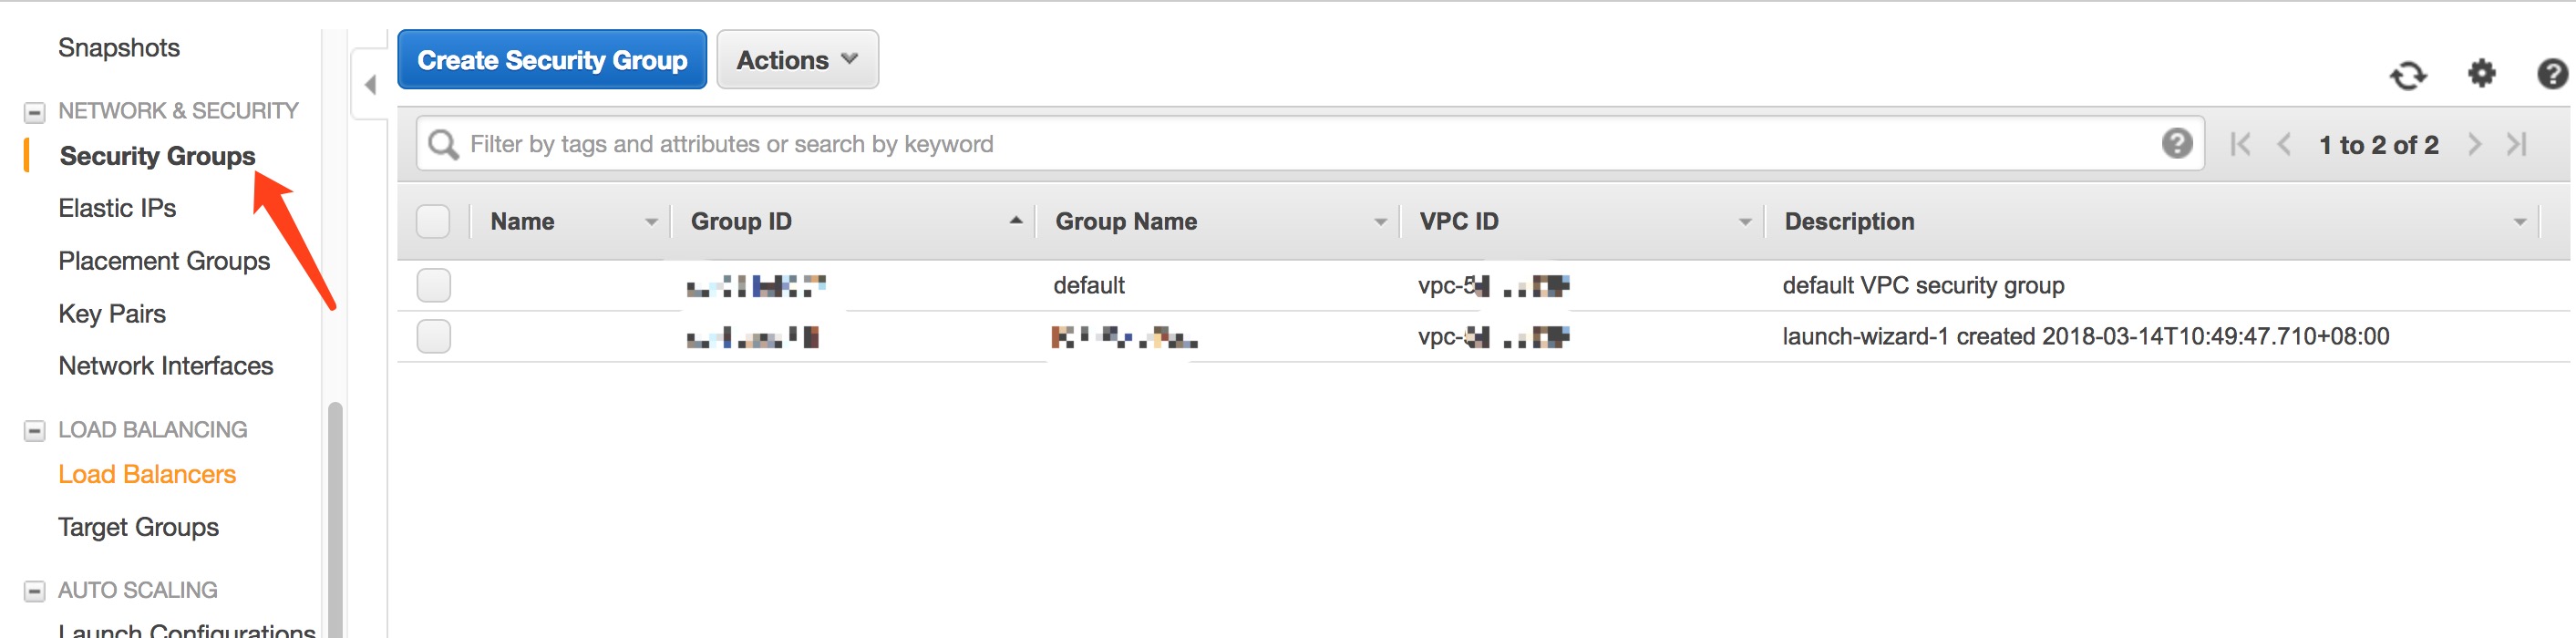
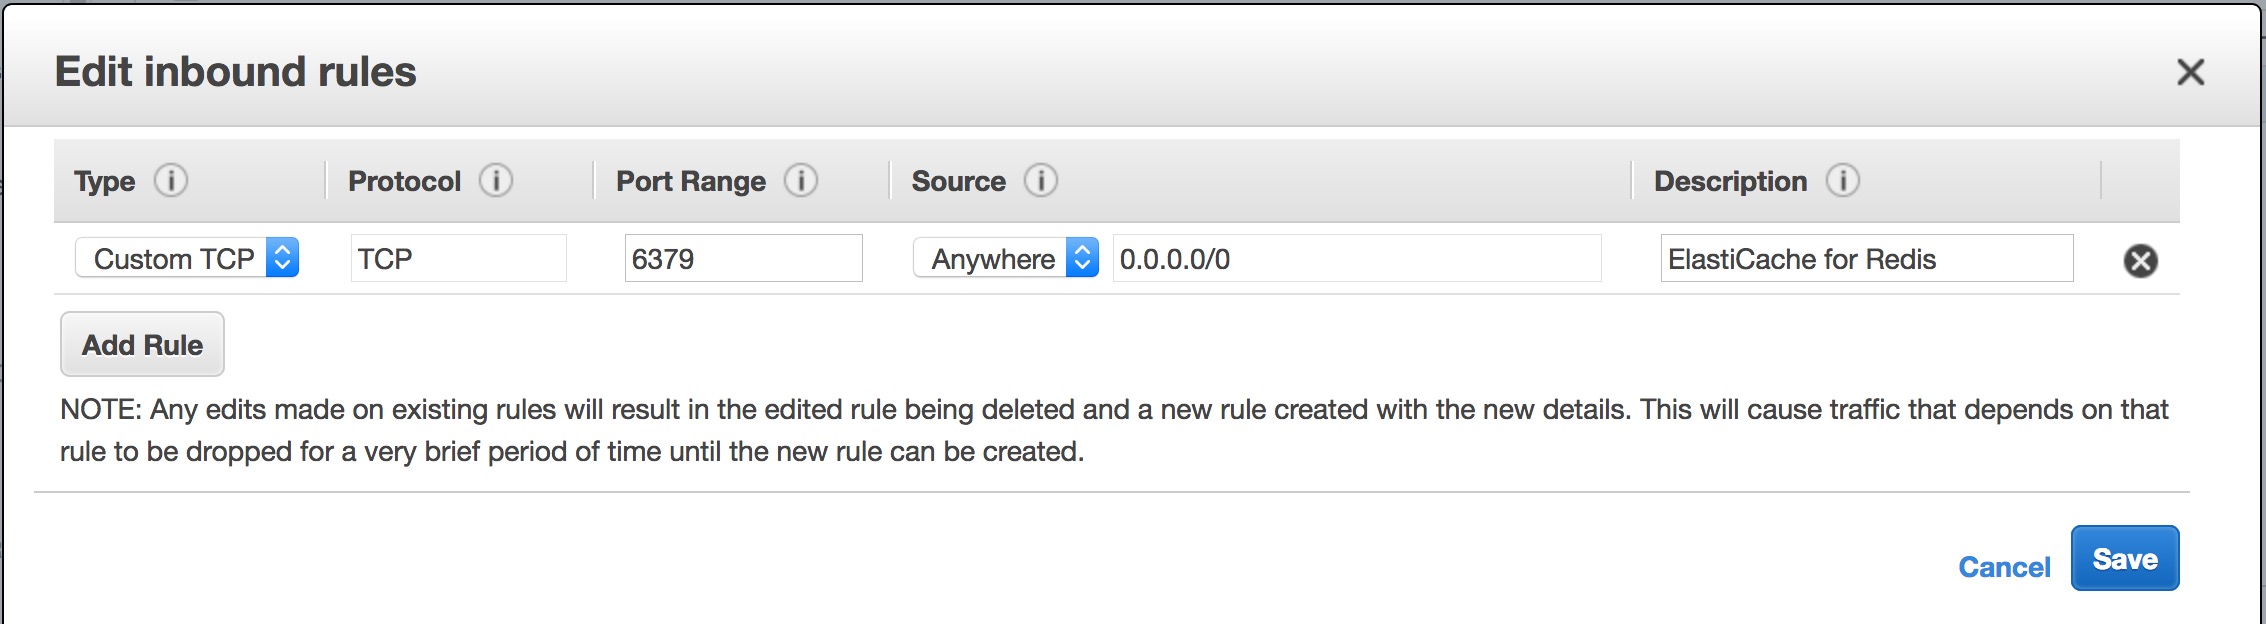
- Edit or Add Security Groups
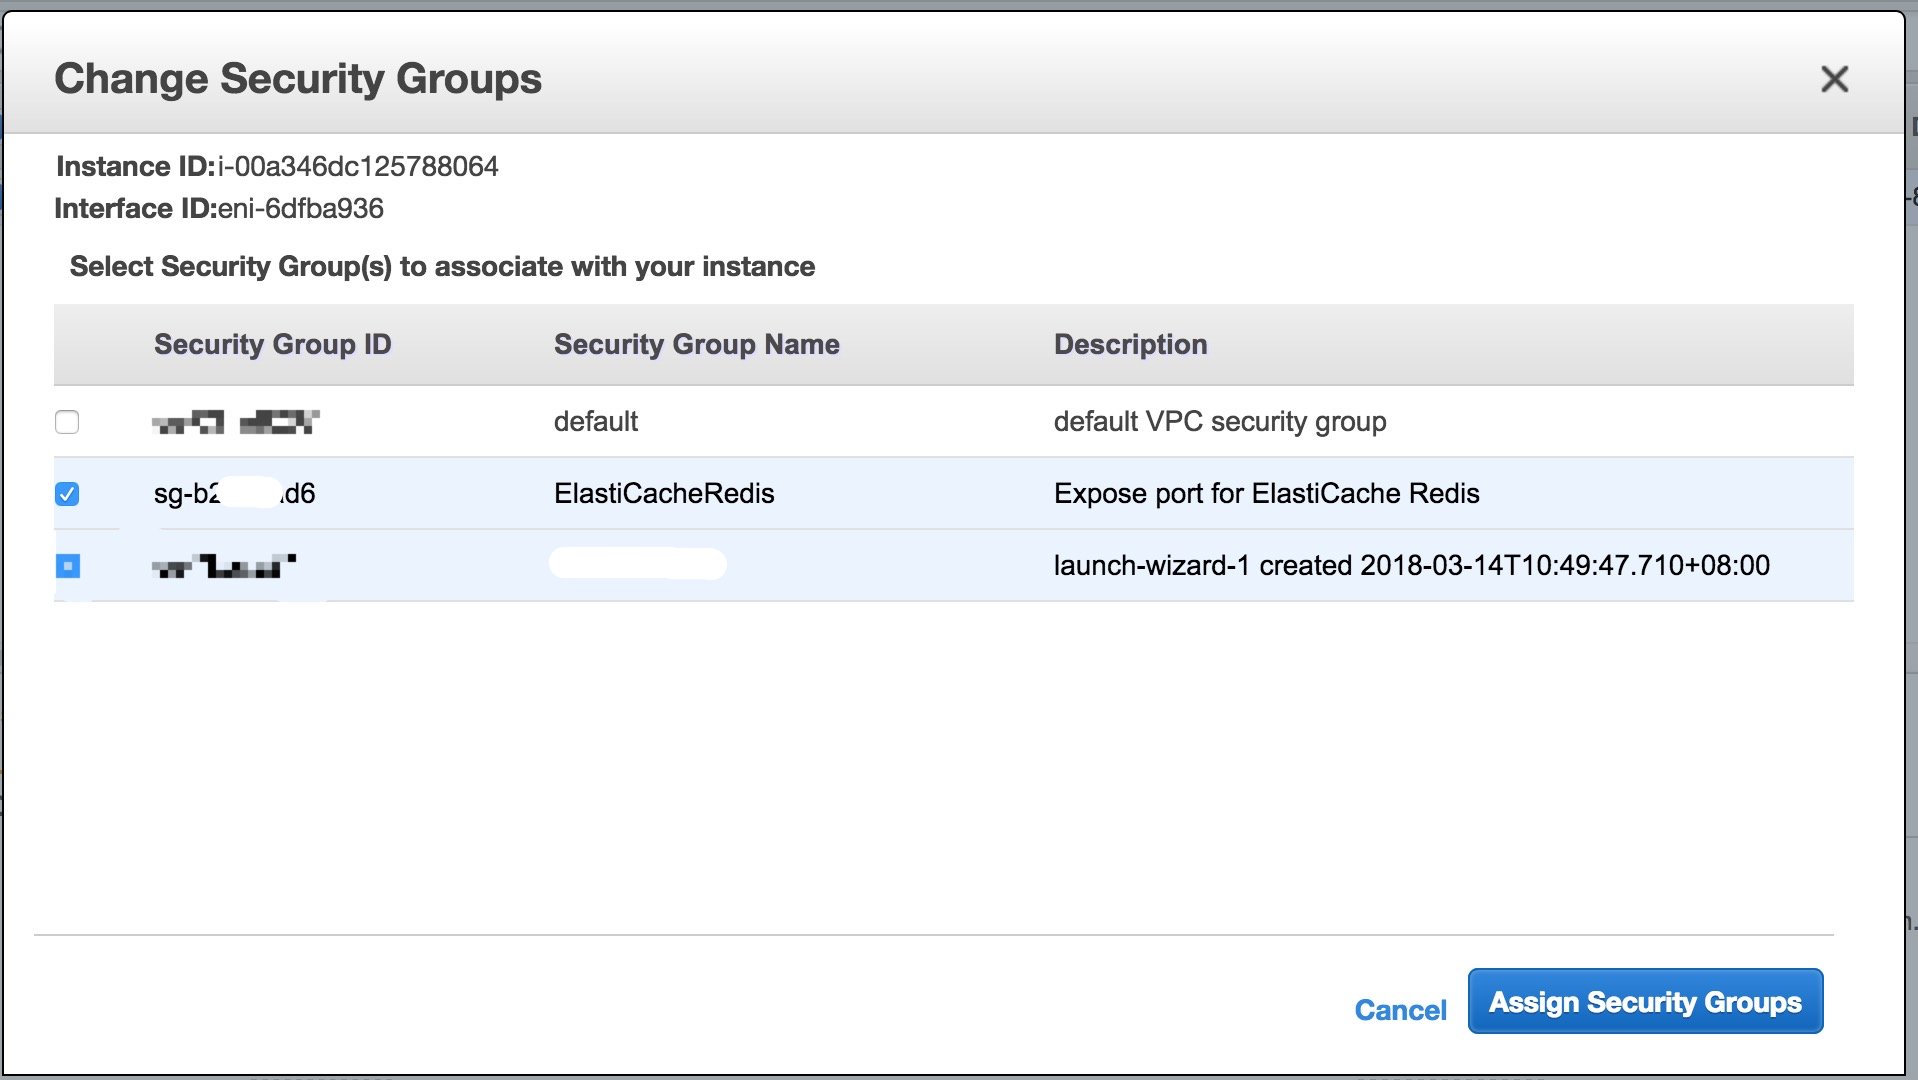
AWS recommend creating a VPC Security Group that will be used exclusively by ElastiCache. - Attach the Security Groups to the EC2 instance:
Connect to a Cluster’s Node
Find Primary Endpoint:
Get the Primary Endpoint from cluster’s detailsAlso we can get the cluster’s details by AWS CLI:
1
2
3
aws elasticache describe-cache-clusters \
--cache-cluster-id elasticachefirst \
--show-cache-node-info1
2
3
4
5
6
7
8
9
10
11
12
13
14
15
16
17
18
19
20
21
22
23
24
25
26
27
28
29
30
31
32
33
34
35
36
37
38
39
40
41
42
43
44
45
46
47{
"CacheClusters": [
{
"CacheClusterId": "elasticachefirst",
"ClientDownloadLandingPage": "https://console.aws.amazon.com/elasticache/home#client-download:",
"CacheNodeType": "cache.t2.micro",
"Engine": "redis",
"EngineVersion": "3.2.10",
"CacheClusterStatus": "available",
"NumCacheNodes": 1,
"PreferredAvailabilityZone": "cn-north-1a",
"CacheClusterCreateTime": "2018-03-29T07:48:39.519Z",
"PreferredMaintenanceWindow": "fri:20:00-fri:21:00",
"PendingModifiedValues": {},
"CacheSecurityGroups": [],
"CacheParameterGroup": {
"CacheParameterGroupName": "default.redis3.2",
"ParameterApplyStatus": "in-sync",
"CacheNodeIdsToReboot": []
},
"CacheSubnetGroupName": "elasticachetestnet",
"CacheNodes": [
{
"CacheNodeId": "0001",
"CacheNodeStatus": "available",
"CacheNodeCreateTime": "2018-03-29T07:48:39.519Z",
"Endpoint": {
"Address": "elasticachefirst.xyz.0001.abc.cache.amazonaws.com.cn",
"Port": 6379
},
"ParameterGroupStatus": "in-sync",
"CustomerAvailabilityZone": "cn-north-1a"
}
],
"AutoMinorVersionUpgrade": true,
"SecurityGroups": [
{
"SecurityGroupId": "sg-031e8267",
"Status": "active"
}
],
"AuthTokenEnabled": false,
"TransitEncryptionEnabled": false,
"AtRestEncryptionEnabled": false
}
]
}A Redis (cluster mode disabled) primary endpoint looks something like the above.
Connect to a Redis Cluster or Replication Group
Now that you have the endpoint you need, you can log in to an EC2 instance and connect to the cluster or replication group.- Login to EC2 instance
Use the
redis-cliutility to connect to a cluster that is not encryption enabled and running Redis
Maybe you need to installredis-cli:1
2
3
4
5
6
7sudo yum install gcc
wget http://download.redis.io/redis-stable.tar.gz
tar xvzf redis-stable.tar.gz
cd redis-stable
make distclean // Ubuntu systems only
make
cp src/redis-cli /usr/bin/Check If Redis is working:
1
2
3
4
$ redis-cli -h elasticachefirst.xxxx.0001.cnn1.cache.amazonaws.com.cn
elasticachefirst.xxxx.0001.cnn1.cache.amazonaws.com.cn:6379> ping
PONG
elasticachefirst.xxxx.0001.cnn1.cache.amazonaws.com.cn:6379>The Redis Server is working!
Note: The ElastiCache instance and EC2 instance must have same Security Group, otherwise EC2 instance cannot connect to ElastiCache.
Now the Redis Server on AWS is up. For Prod, we should set Redis as Multiple Shards Multiple Nodes.
Reference
https://docs.aws.amazon.com/AmazonElastiCache/latest/UserGuide/GettingStarted.AuthorizeAccess.html